
Create calendars to organise your events
Group events into calendars, assign with a swipe, and rename or delete a calendar when plans change.
Calendars group your events: birthdays in one place, trips in another, work deadlines somewhere you can ignore on a Saturday. They power the list filter and the Calendar Countdown widget, and they are a Premium feature.
Create a calendar
- Tap All Events at the top left of the list.
- Tap Add Calendar.
- Give it a name. The app picks its colour for you.
Put events in it
- The quick way: swipe left on an event in the list and tap Calendar, then choose where it belongs.
- Or open the event, tap edit, and set its calendar there.
Events you have not filed live under Unassigned Events, so nothing is ever out of reach.
Rename or delete a calendar
In the All Events screen, swipe left on the calendar:
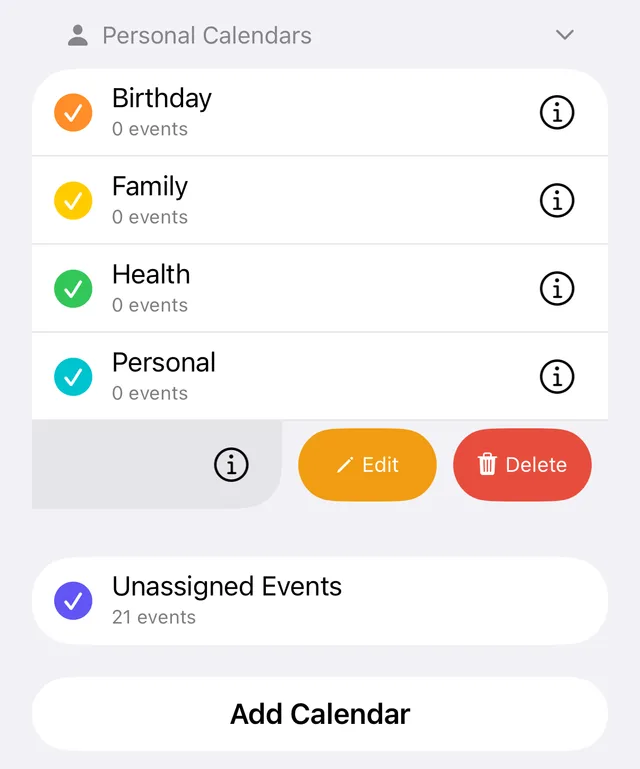
- Edit renames it.
- Delete moves the calendar to Recently Deleted, where it can be restored for 30 days: see Restore a deleted event.
Filter the list
The same All Events screen also controls what your list shows:
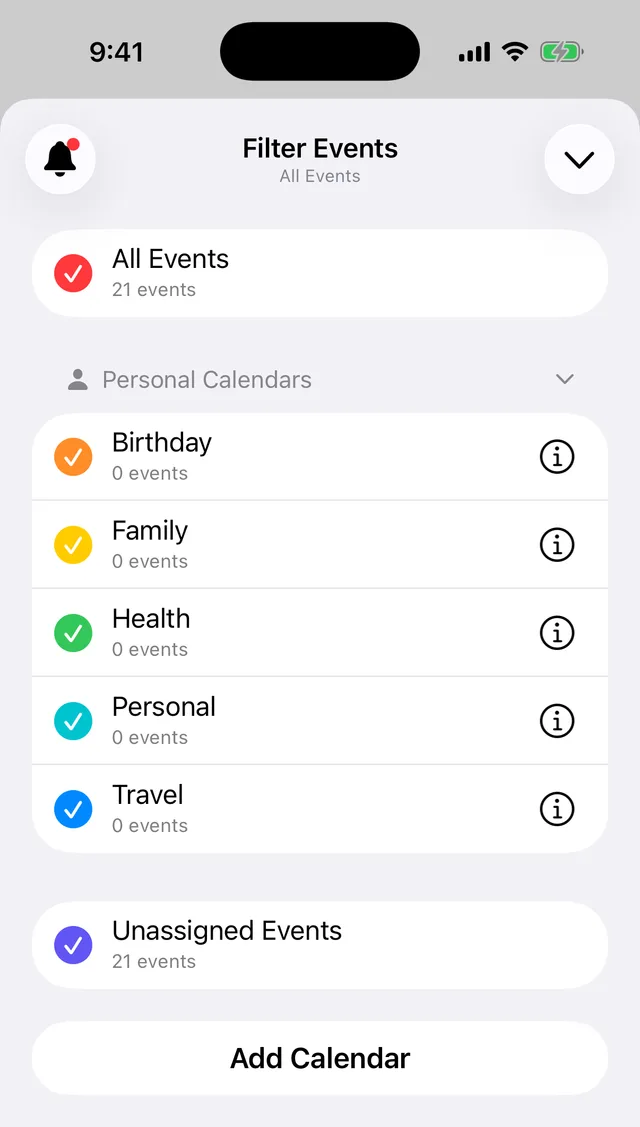
Tick the calendars you want to see and the list shows only their events. You can select as many as you like: just birthdays, birthdays and travel, whatever suits the moment. The All Events row at the top is a quick toggle: tap it to select every calendar, tap it again to clear them all.
Your selection sticks until you change it, so if some events seem to be missing from the list, check this screen first.
Did this not solve it? Contact us and include what you tried. In the app, Settings then Contact Support attaches the details that help us find your account.